Hey everyone! If you haven't noticed there hasn't been any activity on this blog in aaaages! The main reason for this is that I have a new blog up and running and it's covering everything including the cooking side of things. We are all more than just what we eat and so it's a general home/lifestyle blog (with lots of yummy recipes of course). I've transferred everything from here onto the new blog but I will leave this blog up just in case you have bookmarked any of the pages. It's been a fun time with you all and I really hope to see you over on Finding Home.
Thanks for all the clicky-love over the years, you guys are awesome!
Sorcha xxx
Oct 16, 2012


Jul 23, 2012
Chocolate Cherry Box Cake

One final thing: this is not a cake for the faint-hearted. If you're baking for the first time I recommend starting with something a little simpler, there's a lot going on here so you need to be fairly confident about throwing the cake layers together as 99% of your attention will be on the chocolate sheets and the cherries. By all means have a go but don't be dis-heartened if it doesn't turn out the way you want/expect it to - we all need to walk before we can run!
Chocolate Cherry Box Cake
Ingredients
(for the chocolate layers)
225g unsalted butter
225g caster sugar
4 medium eggs
175g self-raising flour
50g cocoa powder
(for the cherry layers)
225g unsalted butter
225g caster sugar
4 medium eggs
175g self-raising flour
1 can pitted cherries, drained and chopped
Red food paste
To decorate
500ml double cream
500g dark chocolate
200g white chocolate
800g fresh cherries
Cup of brandy
1 can pitted cherries, drained and chopped
3 tbsp cherry jam
Red ribbon
Edible Glue
1. Rinse and dry your fresh cherries. Tie knots in the stems. Put them in a large deep tray in a single layer and pour over the cup of brandy. Cover and leave to infuse.
2. Preheat your oven to 180C/350F/Gas Mark 4. Grease and line 4x8 inch square baking tins.
3. Cream together the butter and sugar for the chocolate layers until light and fluffy. Added the eggs one at a time (with a tbsp of the flour to prevent the mixture curdling) into the mixture.
4. Sift half the flour and cocoa into the bowl and fold it in with a metal spoon (metal spoons are best for folding as they have thinner edges and are less likely to knock air out). Sift in the rest of the flour and cocoa and fold this through as well.
5. Divide the mixture between two of your tins and smooth it down with a palette knife/back of a spoon. Bake for 20-25 mins (until an inserted skewer comes out clean).
6. Allow to cool slightly in the tins before turning out onto a wire rack to cool fully.
7. Whilst your chocolate layers are baking you can start coating your cherries. You'll need 49 chocolate coated cherries for this but I'd do a good few more in case there's a few ugly ones (and so you can eat the leftovers too!). Drain your brandied cherries (keeping about 2 or 3tbsp of the brandy for later) and allow them to dry fully. Melt your white chocolate in a glass bowl over a simmering pan of water (make sure the bottom of the bowl doesn't actually touch the water). Once your chocolate is melted dip one side of each cherry into it (you need to work fast before the chocolate starts to set again). Arrange them on a tray lined with greaseproof paper and pop in the fridge to set.
8. Now, onto the cherry cake layers. Again, cream together your butter and sugar as before. Add your eggs one at a time again and sift in the flour as before as well. Fold in the flour, then fold in the cherries. Add the red food paste a little at a time and continue folding until you have a colour you're happy with.
9. Divide the mixture between two tins again and level off. Bake at the same temperature for 20-25 mins until an inserted skewer comes out clean. Cool slightly in the tin and then turn out onto wire rack to cool fully.
10. Whilst your cakes are cooking you can start on the chocolate sheets for the edges. Melt 400g of your dark chocolate in the same way you melted the white chocolate. Remove from the heat as soon as it is cool. Ideally you should temper the chocolate but I didn't have a marble slab to hand so this is what I did:- leave the chocolate in a bowl until it's about 38C. Whilst it cools cover your kitchen table with LOTS of clingfilm. Pour out the cooled chocolate onto the clingfilm and smooth out into a large square/rectangle with a cake smoother (you want it quite thin so smear to your hearts content!). Leave the chocolate to set (this will take HOURS).
11. Chop your other can of pitted cherries and mix with the cherry jam and reserved brandy. Cover and leave in the fridge until you need it. Melt your final 100g of dark chocolate and dip the other side of your chocolate coated cherries. Put back on their tray and refrigerate until needed.
12. Just as the chocolate was firming (but not set) I covered it with greaseproof paper and went to bed. Had copious nightmares about said cake and then got up at 7:30am on my DAY OFF to finish it. I would not recommend this part of my technique!
13. Once your cakes are cooled and the chocolate is set you can start the assembly. First, whip your double cream until you have very stiff peaks. Take your cake board. Put a layer of red cherry cake down first. Cover this in a layer of whipped cream and then one third of the cherry-brandy jam. Add one of your chocolate layers, cream, one third cherry-brandy jam etc, finishing on a chocolate layer. Cover cake in clingfilm. Invert square baking tin over the top of the cake and weigh down with a really heavy book and some cans (you want to compress the layers together at this point).
14. Whilst the cake compresses slice your chocolate sheets into 4 long rectangles about a half inch higher than your cake.
15. Uncover cake and crumbcoat with whipped cream. Add a slightly thicker layer to the edges. Line up a chocolate sheet to one side. It should stick to the cream for you. Using a solid board behind the chocolate that sticks out the sides, and a sharp knife on the front side, cut off the excess chocolate (this is a very delicate process and a pain in the ass). Repeat on all sides of the cake.
16. Pipe the rest of your whipped cream onto the top of the chocolate cake box and level. Add 7 rows of 7 chocolate dipped cherries to the top. Stick one end of your ribbon to the middle of the chocolate with edible glue. Pull it (gently) round the box, gluing at intervals, until you reach the end which you also glue in place.
So there you have it. One fancy-pants birthday cake which will disturb your sleep and make your kitchen look like Willy Wonka exploded in it. Totally worth the effort though, it does look pretty awesome.
May 14, 2012
Curried Chicken & Mango Salad

I came across this recipe in the May 2012 issue of Good Food magazine and I just couldn't wait to try it. Mango! Curry! Chicken! Sesame seeds! All things I love, love, love to eat and it was everything it promised to be - light and delicious, spicy and exotically flavour-some. Don't just take my word for it though - give it a go and try it for yourself!
Serves: 2 as a main dish, or 4 as a starter.
Ingredients
6 chicken mini fillets
1tsp olive oil
2tsp curry powder (I used a hot curry powder)
4tbsp natural yoghurt
2tbsp mango chutney
zest and juice of half a lime
1 Little Gem lettuce (I actually used Cos as that's what the shop had), leaves separated
1 ripe mango, peeled and sliced
half a red onion, finely sliced
2tsp toasted sesame seeds
- Heat the oven to 200C/Gas mark 6 and line a baking tray with tinfoil. Toss the chicken fillets in the oil and 1tsp of the curry powder, making sure that they're evenly coated. Place on the baking tray and bake for 20 mins or until cooked through. Allow to cool slightly and then slice.
- Meanwhile, combine the rest of the curry powder in a bowl with the yoghurt, chutney and lime zest and juice.
- To serve, arrange the lettuce leaves on your plates. Top with the sliced mango and chicken. Scatter over the red onion slices, drizzle with the dressing and then scatter with the sesame seeds.
- Enjoy!
Buttercream
Since I use it so much in my baking I suppose I should give you all some simple variations that you can use again and again!
Let's start with the basic buttercream mix:
225g unsalted butter, softened
1tbsp milk
350g icing sugar
Beat it all together until smooth. Simples!
However, it just takes the smallest of steps to turn this oh-so-easy icing into something more!
Citrus buttercream - replace the milk with the same quantity of orange, lemon or lime juice and maybe some finely grated zest too if you'd like.
Chocolate buttercream - replace 55g of the icing sugar with 55g cocoa.
Coffee buttercream - replace the milk with the same quantity of strong cold espresso and a quarter teaspoon of coffee extract.
Nut buttercream - Reduce butter to 175g then add a quarter teaspoon vanilla extract, 55g smooth peanut butter and 100g chopped nuts of your choice.
Raspberry/Strawberry buttercream - replace the milk with the same quantity of raspberry/strawberry coulis and stir 75g chopped raspberry/strawberry through the finished icing.
Bailey's buttercream - replace the milk with the same quantity of Bailey's.
Mocha buttercream - replace 55g of the icing sugar with 55g cocoa and replace the milk with the same quantity of strong cold espresso.
Orange-choc buttercream - Replace 55g of the icing sugar with 55g cocoa. Replace the milk with the same quantity of orange juice and add either a quarter tsp of orange extract or a good pinch of finely grated zest.
As you can see the only thing that limits you with buttercream is your imagination! Let me know if there are any "must-try" combinations that you swear by that I haven't listed here!
Let's start with the basic buttercream mix:
225g unsalted butter, softened
1tbsp milk
350g icing sugar
Beat it all together until smooth. Simples!
However, it just takes the smallest of steps to turn this oh-so-easy icing into something more!
Citrus buttercream - replace the milk with the same quantity of orange, lemon or lime juice and maybe some finely grated zest too if you'd like.
Chocolate buttercream - replace 55g of the icing sugar with 55g cocoa.
Coffee buttercream - replace the milk with the same quantity of strong cold espresso and a quarter teaspoon of coffee extract.
Nut buttercream - Reduce butter to 175g then add a quarter teaspoon vanilla extract, 55g smooth peanut butter and 100g chopped nuts of your choice.
Raspberry/Strawberry buttercream - replace the milk with the same quantity of raspberry/strawberry coulis and stir 75g chopped raspberry/strawberry through the finished icing.
Bailey's buttercream - replace the milk with the same quantity of Bailey's.
Mocha buttercream - replace 55g of the icing sugar with 55g cocoa and replace the milk with the same quantity of strong cold espresso.
Orange-choc buttercream - Replace 55g of the icing sugar with 55g cocoa. Replace the milk with the same quantity of orange juice and add either a quarter tsp of orange extract or a good pinch of finely grated zest.
As you can see the only thing that limits you with buttercream is your imagination! Let me know if there are any "must-try" combinations that you swear by that I haven't listed here!
Clíona's Amazing Chocolate-Caramel Christening Cake

Hello everyone! I've been a busy little bee the last few weeks - a new job and lots of life-stuff going on. My little niece-to-be had her chistening ceremony recently and her Mum asked me to make a cake I'd made before that she'd really liked. Well - say no more!
I won't lie...2 days went into the decorating of the cake (well, I do have to work too!) but the basic cake itself is very simple and even a novice cook should be able to knock this one out in an evening. The decorating is slightly trickier but there's nothing stopping you from giving it a bash, after all, this is my first attempt of doing anything like this myself.
A word of warning: this is RICH cake. Tiny slices. Seriously. You'll thank me later.
Makes a very tall 8" cake - approx. 12-16 slices
Ingredients
For the Vanilla & Chocolate sponges
225g unsalted butter, softened
225g caster sugar
175g self-raising flour
85g ground almonds
1tsp baking powder
3 eggs
150ml natural yoghurt
1tsp vanilla extract
5tbsp cocoa powder
For the Caramel & Choc-caramel sponges
225g unsalted butter, softened
175g soft light brown sugar
50g dark brown sugar
175g self-raising flour
85g ground almonds
1tsp baking powder
3 eggs
150ml natural yoghurt
1tsp vanilla extract
1tbsp cocoa
To assemble and decorate
1 can Carnation Caramel
1 quantity chocolate buttercream
- Preheat oven to 180C/Gas Mark 4. grease and line the bases of 2 x 8 inch (20cm) sandwich tins with baking paper.
- For the vanilla and chocolate sponges mix all the ingredients, apart from the cocoa, together with an electric whisk. Transfer half the mix into another clean mixing bowl and whisk in the cocoa. Scrape the mixes into the tins and bake for 20-25 mins until a skewer poked in comes out clean.
- Repeat this for the caramel and choc-caramel sponges, again reserving the cocoa until you've split the mix between two bowls and whisking it into one batch. Bake as before.
- Allow the 4 sponges to cool fully on a wire rack.
- Place the vanilla sponge on a base (or plate) of your choice. Spread a third of the caramel over the base sponge and top with the caramel sponge. Spread another third of the caramel over this and top with the choc-caramel sponge. Spread the final third of the caramel over the choc-caramel sponge and top with the chocolate sponge.
- Cover the cake in chocolate buttercream and chill in the fridge for an hour.
- Remove from fridge at least 15 mins before serving.
- Relax, enjoy, and watch everyone marvel when you cut into the cake and they see the colour graduations of the sponges!
Mar 23, 2012
Earl Grey Tealoaf

I used to hate things like this, didn't like fruit in cakes and buns at all. In fact, hard as it may be to believe but I used not like baked goods at all. Yes, I was MUCH skinnier back then! I didn't know what I was missing out on though, and once I started to change recipes to suit what I do like then I discovered that actually, fruity cakes aren't that bad at all. So here's my take on the humble tea loaf...made a bit fancier with posh tea and a variety of fruits.
Makes 1 loaf
Ingredients
350g mixture of sultanas, dried apricots and dried dates plus the zest of one lemon
140g dark muscovado sugar
300ml hot black tea made with 2 earl grey teabags
300g self-raising flour
1 large egg
1. Put the fruit and sugar in a bowl and pour over the hot tea. Stir well, then cover and leave to soak overnight (I actually leave it for 2-3 days).
2. To cook, heat oven to 150C/gas mark 2 and lightly grease a 1lb loaf tin and line with a wide strip of baking parchment (helps lift it out when it's done).
3. Stir the flour and egg into the fruit mixture, turn into the tin and level the surface. Bake for about an hour and a half until well risen and a skewer inserted into the loaf comes out clean.
4. Cool for a few mins in the tin then turn out onto a wire rack and allow to cool fully.
Gorgeous on it's own, spread with butter, toasted, or if you're feeling really bad fried with butter and golden syrup! Can be frozen too if you're making it ahead of a party or something, just wrap it in tinfoil and allow to thaw at room temperature.
Sticky Ginger Cupcakes

Well, buns really. They were meant to be cupcakes but I had no muffin cases left so I made them in bun cases instead. I LOVE ginger. LOVE it. Ginger bread, ginger in stir-frys, ginger beer, ginger biscuits. It's up there with lemon as one of my favourite flavourings so it will come as no surprise to you all that these buns did not last long in our kitchen...or that the leftover icing was eaten from the mixing bowl with a spoon...
Sticky Gingerbread Buns
(makes about 16 buns, less if using muffin cases for proper cupcakes)
Cake mix
115g plain flour
2tsp ground ginger
three-quarter tsp ground cinnamon
1 piece stem ginger, finely chopped
three-quarter tsp bicarbonate of soda
4tbsp milk
85 butter, softened
70g soft dark brown sugar
2tbsp black treacle
2 eggs, lightly beaten
Frosting
85g butter, softened
175g icing sugar
2tbsp syrup from the stem ginger
1 piece stem ginger, finely sliced, to decorate
1. Preheat oven to 160C/325F/Gas 3. Line bun tins with paper cases (or muffin tins with muffin cases).
2. Sift the flour, ground ginger and cinnamon together into a bowl. Add the chopped ginger and toss in the flour mixture until it is well coated. Place the bicarbonate of soda and milk in another small bowl and stir to dissolve.
3. Beat the sugar and butter together in a large bowl until light and fluffy. Beat in the treacle, then gradually mix in the eggs. beat in the flour mix, then gradually add the milk mix. Spoon the mixture into the prepared cases.
4. Bake in the oven for 20 mins, or until well risen and golden brown. Allow to cool for 2 mins in the trays before removing to a wire rack and allowing to cool fully.
5. To make the icing put the butter in a bowl and beat until fluffy. Add the icing sugar and syrup and beat together until smooth and creamy. Spread the icing on top of each completely cold bun, then decorate with pieces of the stem ginger.
(You can turn these into gingernut buns by adding 40g finely chopped walnuts or pecans to the mix and then sprinkling with a few chopped nuts when iced).
Frosted Yoghurt Orange Cake

I found this recipe in GoodFood's 2012 calendar (it's the January recipe). GoodFood do this calender every January issue and it is month upon month of delicious recipes and gorgeous food photography. As is their entire magazine every month actually. Go on, go out and buy a copy. I'll wait...
Anyway, this is a great post-Christmas treat (she says in the middle of March). It's tangy and not too sweet so ideal for the post-chocolate period when we've all eaten far too much. It's also dead handy to throw together if you're expecting people at short notice - almost everyone has a jar of marmalade and some yoghurt hiding in their fridge.
IngredientsCake
175g unsalted butter, melted and cooled (plus extra for greasing)
225g self-raising flour
175g caster sugar
grated zest of 2 oranges
3 large eggs
150g pot of natural yoghurt
Frosting
250g tub mascarpone
85g icing sugar
3 tbsp fine shred marmalade
1. Heat oven to 180C/Gas 4. Grease a 1kg loaf tin, then line with a strip of parchment.
2. Mix the flour, sugar and orange zest in a large bowl.
3. Beat the eggs, melted butter and yoghurt together in a jug. Pour into the dry ingredients and mix well.
4. Tip the batter into the loaf tin, smooth the top and bake for 50mins-1 hour (until a skewer inserted into the cake comes out clean). Cool in the tin.
5. To make the frosting beat the mascarpone, icing sugar and marmalade together with a spoon until well mixed. Remove the COLD cake from the tin and strip off lining paper. Spread the top with the frosting and pop in the fridge to chill. Return to room temp before eating. Enjoy!
Another Apology
Yes, again...
As always I've been very neglectful of my blogging duties - this blog hasn't been updated since June LAST YEAR - apologies to anyone who starved whilst awaiting further recipes...
Anyway. I have been busy (and further to my last post the whole dieting thing died a death!). We've moved house - TWICE! I started college. I left college. We got engaged. My brother emigrated. We welcomed new babies into our extended circle of family and friends. I turned 30 (I know, I know, I'm really very old now aren't I?). Lots of other minor bit and pieces have happened that don't spring to mind now (and others that do but I'd rather keep to myself, I'm sure you understand).
So hello again to all. I am hoping that 2012 will be a more productive year for me, both in the kitchen and outside of it. Let me know if there's any recipes you'd like to see here and I'll do my best to accommodate you.
As always I've been very neglectful of my blogging duties - this blog hasn't been updated since June LAST YEAR - apologies to anyone who starved whilst awaiting further recipes...
Anyway. I have been busy (and further to my last post the whole dieting thing died a death!). We've moved house - TWICE! I started college. I left college. We got engaged. My brother emigrated. We welcomed new babies into our extended circle of family and friends. I turned 30 (I know, I know, I'm really very old now aren't I?). Lots of other minor bit and pieces have happened that don't spring to mind now (and others that do but I'd rather keep to myself, I'm sure you understand).
So hello again to all. I am hoping that 2012 will be a more productive year for me, both in the kitchen and outside of it. Let me know if there's any recipes you'd like to see here and I'll do my best to accommodate you.
Jun 23, 2011
Chocolate Orange Cupcakes

Makes: 36 mini cupcakes or 12-14 cupcakes (I made 24 minis and 6 normal - yes I know there's only 20 minis in the photo - the other 4 were eaten as they were iced. They're THAT BLOODY GOOD!)
Ingredients
For the cupcake mix
150g/5.5oz unsalted butter, softened
75g/2.75oz plain chocolate
250g/9oz caster sugar
5 large eggs
150g/5.5oz plain flour
2 tsp baking powder
Pinch of salt
Grated rind of 2 oranges
For the icing
550g/1lb icing sugar
160g/5.6oz unsalted butter, softened
50ml orange juice
50g/1.75oz cocoa powder
Grated rind of 1 orange
Method
- Preheat your oven to 180C/350F/Gas Mark 4. Line an appropiate sized tin with the paper cases of the size cupcakes you wish to make (i.e. muffin tin lined with muffin cases). Melt the chocolate in a heatproof dish set over a simmering pan of water (or in the microwave making sure you don't allow it to burn). Once melted set aside and allow to cool slightly (but not become solid).
- Beat the butter and sugar together in a bowl until light and fluffy. Gradually beat in the eggs. Sift in the flour, baking powder and salt into the mixture and fold together with a metal spoon.
- Fold the orange rind into the mixture. Check that your chocolate has cooled, then add it to your mixture and fold in again.
- Divide the batter between the cases, filling each one to about two-thirds full. Bake in the oven for 15-20 minutes (less if you're making the mini cupcakes) or until risen and springy to the touch (a skewer poked through the middle of one should come out clean). Leave to cool slightly in the tin before removing to a wire rack and allowing to cool fully (this is very important as otherwise the icing will melt and run off them).
- While the cakes are cooling you can make the icing. Whisk together the icing sugar, cocoa powder and butter in a clean bowl until the mixture resembles fine breadcrumbs. Add the orange juice and zest and whisk at a high speed for several minutes until light and fluffy (the longer you whisk the fluffier the icing you'll get).
- Divide the icing between the cold cupcakes.
You could decorate the tops with little orange sweets, edible orange glitter, candied orange peel or pieces of Terry's Chocolate Orange if you're really feeling decadent! Mine sadly didn't last long enough to properly decorate and photograph nicely... I will be making them again (for a party or something, not for us to sit down and eat on our own in an evening!) and will decorate them properly then and update the photo!
Cupcakes and Diets

This does give me the chance to explore new recipes though (every cloud has a silver lining) and I've been having fun with the low-fat challenge. Kezz has just started training too (more on that another time) so this couldn't be more timely. We're getting up early in the mornings, he goes running while I do some yoga and already there's a difference. The hardest part is my sweet tooth though, I didn't realise how much chocolate I'd been eating until now. I'm trying to switch over to other sweets for my evening consumption in front of the tv - currently chomping on Panda Natural Blueberry Liquorice - delicious!
The main cause of my weight gain are Earl Grey Tea Cupcakes (see pic at beginning of post). These are from The Hummingbird Bakery Cake Days, a fabulous book full of far too many scrumptious treats (you'll find a link to it at the end of this paragraph)! These are insanely good, everyone who has tried them goes nuts for them. It's the best of both worlds really, tea, and cake, in a bun! I will add that I usually have quite a bit of frosting left over from this recipe. I tend to pop the leftovers into the fridge and bake another half batch a day or two later to use it up. Or indeed, I have been known to sit down and eat the leftover frosting with a spoon...is it any wonder I've gained weight? I won't divulge their recipe here but I will recommend that you go out and buy this book immediately! Make these, and have a few for me :)
Jun 16, 2011
A New Start, and Some Delicious Seeded Bread
Well hello everyone! Apologies for the lack of activity the last 2 months or so, I've been busy!
So, what have I been up to? Well, I've been making, and eating, lots of cake and other yummy delights (my poor waistline!). I've also been making lots of jewellery and trying to sell it. It's going, eh, okay I guess. Definitely not as much fun as the cooking is though which is why I have decided to turn my energies back here. I'm even looking into going back to college to study culinary arts. Well, 30 is the new 20 after all... So this fresh start down in Co. Cork is going to turn into a fresh start career-wise as well. I have to admit, I'm very, very excited!
In honour of all this new-ness I thought I'd share a brand new recipe with you guys today. Fresh out of my head, not even finished baking it yet! It's a variation on the white bread that I've been making of late. I LOVE bread, I really do. There's so many things you can use it for. I like my breads simple and unfussy. Kezz likes this bread too but he adores seeded bread so I figured I'd go for the best of both worlds and make my favourite bread seeded this time and see how it went.
I don't know about any of you but I for one hate buying bread. I know how simple it is to make so it just seems wrong to purchase it. Standard sliced pans seem too fluffy and insubstantial since I started making my own and I balk at the prices for artisan breads - what I'd pay for a single loaf I could buy the ingredients and make 4 or 5 myself! Plus who can resist the smell of freshly baked bread, or the seemly magic process of watching the dough rise? That's the best part about making bread yourself, you're not just getting the end product but the whole experience. It brings back memories in such a rush too, sitting in either of my grandmother's kitchens, watching the bread some out of the oven, smothering the still-warm slices in butter and home-made jam and then running outside to eat it in the sunshine, shooing away curious bees attracted by the sweet, warm stickiness. Try putting that in a wrapper!
Nothing can evoke memories in quite the same way that scents can. The smell of coconuts will always remind me of holidays in the sun, and of sunburn! Orange blossom always brings me back to the time I spent in Toronto, though I have no idea where that connection was made. Fresh lemons remind me of my Mum making us pancakes for breakfast, tomatoes remind me of one of my aunts and the greenhouse she had in her former home in Dublin. Scent connects us to our past, to moments shared and experiences we'd almost forgotten.
A final word on this dough before I dive into the recipe; it can be used for almost any variation. The standard dough, sans wheat bran and seeds, makes a lovely white bread. Just leave them out and follow the rest of the recipe as it is. It also makes lovely pizza dough, simply roll it out and cover it in the toppings of your choice after the first proving, then pop it in the oven. It makes insanely good toast with a slightly sticky, chewy texture. Sliced and covered in peanut butter and chopped banana it is the super quick anytime of day snack (honestly, try it - peanut butter and jelly be-damned!). I've made it with beer today but you can use water too, I often do and it's just as good. It can also be used as the base for fougasse (basically a french style focaccia). Anyway, on with the recipe!

Makes: 1 large round loaf
Ingredients
500g/14oz strong white bread flour (plus extra for dusting)
300ml/ 1.25 cups hand-hot water/beer/milk
1 handful of wheat bran
1 generous handful mixed seeds of your choice (I've used sesame, sunflower, linseed and pumpkin)
7g sachet easy-blend yeast (available in most supermarkets) or 15g fresh yeast
2 tsp salt
1 tsp sugar (or honey)
2 tbsp olive oil
Method
So, what have I been up to? Well, I've been making, and eating, lots of cake and other yummy delights (my poor waistline!). I've also been making lots of jewellery and trying to sell it. It's going, eh, okay I guess. Definitely not as much fun as the cooking is though which is why I have decided to turn my energies back here. I'm even looking into going back to college to study culinary arts. Well, 30 is the new 20 after all... So this fresh start down in Co. Cork is going to turn into a fresh start career-wise as well. I have to admit, I'm very, very excited!
In honour of all this new-ness I thought I'd share a brand new recipe with you guys today. Fresh out of my head, not even finished baking it yet! It's a variation on the white bread that I've been making of late. I LOVE bread, I really do. There's so many things you can use it for. I like my breads simple and unfussy. Kezz likes this bread too but he adores seeded bread so I figured I'd go for the best of both worlds and make my favourite bread seeded this time and see how it went.
I don't know about any of you but I for one hate buying bread. I know how simple it is to make so it just seems wrong to purchase it. Standard sliced pans seem too fluffy and insubstantial since I started making my own and I balk at the prices for artisan breads - what I'd pay for a single loaf I could buy the ingredients and make 4 or 5 myself! Plus who can resist the smell of freshly baked bread, or the seemly magic process of watching the dough rise? That's the best part about making bread yourself, you're not just getting the end product but the whole experience. It brings back memories in such a rush too, sitting in either of my grandmother's kitchens, watching the bread some out of the oven, smothering the still-warm slices in butter and home-made jam and then running outside to eat it in the sunshine, shooing away curious bees attracted by the sweet, warm stickiness. Try putting that in a wrapper!
Nothing can evoke memories in quite the same way that scents can. The smell of coconuts will always remind me of holidays in the sun, and of sunburn! Orange blossom always brings me back to the time I spent in Toronto, though I have no idea where that connection was made. Fresh lemons remind me of my Mum making us pancakes for breakfast, tomatoes remind me of one of my aunts and the greenhouse she had in her former home in Dublin. Scent connects us to our past, to moments shared and experiences we'd almost forgotten.
A final word on this dough before I dive into the recipe; it can be used for almost any variation. The standard dough, sans wheat bran and seeds, makes a lovely white bread. Just leave them out and follow the rest of the recipe as it is. It also makes lovely pizza dough, simply roll it out and cover it in the toppings of your choice after the first proving, then pop it in the oven. It makes insanely good toast with a slightly sticky, chewy texture. Sliced and covered in peanut butter and chopped banana it is the super quick anytime of day snack (honestly, try it - peanut butter and jelly be-damned!). I've made it with beer today but you can use water too, I often do and it's just as good. It can also be used as the base for fougasse (basically a french style focaccia). Anyway, on with the recipe!

Makes: 1 large round loaf
Ingredients
500g/14oz strong white bread flour (plus extra for dusting)
300ml/ 1.25 cups hand-hot water/beer/milk
1 handful of wheat bran
1 generous handful mixed seeds of your choice (I've used sesame, sunflower, linseed and pumpkin)
7g sachet easy-blend yeast (available in most supermarkets) or 15g fresh yeast
2 tsp salt
1 tsp sugar (or honey)
2 tbsp olive oil
Method
- Tip the flour into a large mixing bowl, there's no need to sift it. For the dried yeast you can just pour it in too. The fresh yeast needs to be crumbled in and rubbed into the flour a little (like you would if making pastry or a crumble). Add the wheat bran, salt and sugar (or honey) now too.
- To get your hand-hot liquid I find that it's best to take about one-third of the overall liquid and boil it, then add the cold two-thirds. This ensures it's warm without being too hot (it needs to be warm enough the activate the yeast but not so hot that it actually kills it!). Add the oil to the liquid and give it a quick stir.
- Make a well in the centre of your dry ingredients and pour in all the liquid and oil mix in one go. Mix quickly using your hand (or a wooden fork) to make a soft, sticky dough. Make sure you wipe the dough around the bowl to pick up any loose flour.
- Sprinkle a clean work surface with flour and turn our the dough onto it. Knead the dough by stretching it away from you, and then folding it in half toward you before stretching it away again. Give it a quarter turn and repeat. You'll get into a rhythm after a minute and it's a great way for working out any stress or frustrations!
- After a few minutes make a little pocket in the dough and pour your choice of seeds in here. Continue kneading for a few more minutes until you have a nice scattering of seeds throughout and the dough is smooth.
- Put the dough back in the mixing bowl, cover with a clean tea towel and leave to rest for an hour. The dough has risen enough when it has doubled in size and springs back when you press it gently with your finger. This is the first proving.
- Tip the dough onto a floured surface once more and knead gently for a few seconds to remove air bubbles (knock it back as it's called). Shape into a round and place on a non-stick baking sheet. Make 3 or 4 slashes across the top with a sharp knife. Cover once more and rise for 30 minutes (this is the second proving). While it rises preheat your oven to 240C/475F/Gas Mark 9. Bake for 30-35 minutes until browned and crisp (you'll know it done if you tap the bottom of the loaf and it sounds hollow).
- Cool on a wire rack. This bread should keep for 2-3 days but honestly, it's normally all gone by the next morning in this house!
Mar 5, 2011
Three Fruit Scones

I love fruit scones. I especially love ones that are bursting with fruit! It's such a shame that most scones these days are limited to a handful of raisins, there's so much more that could be added! I've used the dried fruits I happened to have in the kitchen for these, but try any combination you like, once you keep the quantities the same you'll be laughing!
Makes: 10 scones
Ingredients
120g dried fruits (I've used 45g sultanas, 45g chopped dried apricot, 30g chopped dried prunes)
450g self-raising flour, plus extra for dusting
2 teaspoons baking powder
120g butter
2 large eggs
5 tablespoons milk, plus extra for glazing
Pinch of salt
Orange juice for soaking
Method
- Preheat the oven to 200C/400F/Gas Mark 6.
- Put the fruit mixture in a bowl and pour in enough orange juice to cover. Stir, and leave aside.
- In a large bowl mix your flour, salt and baking powder. Rub in the butter until the mixture resembles fine breadcrumbs.
- In another bowl or a jug beat the eggs and milk together. Drain the fruit.
- Make a well in the centre of your dry ingredients and pour in your egg mix, followed by the mixed fruit. Stir well, until you have a soft, dry dough.
- Turn out the dough onto a floured surface and roll out to a thickness of 2cm. Using a 7cm cutter cut circles from the dough. You'll need to add the scraps together and re-roll it to get all 10, but try not to over-work the dough either.
- Place the scones on a baking sheet and glaze by dipping a pastry brush into some milk and brush over the scones.
- Pop in the oven and bake for 15-20 minutes, or until a lovely golden brown.
- Allow to cool slightly on a wire rack before serving. I'll have mine with real butter and a coffee thanks! :)
My Best White Bread

Nothing beats the smell of freshly baked bread coming out of the oven, or slicing it to the exact thickness you require, not what (insert big bread company name here) thinks you should have. Like everything else made at home there's no unpronounceable ingredients, no chemicals added to make it last for weeks on a shelf, no plastic bag. Just you, a warm kitchen, and a little bit of love.
Makes 1 large loaf.
Ingredients
450g strong white flour, plus extra for dusting
Good pinch of salt
7g sachet dried yeast
1tbsp vegetable oil, plus extra for greasing
300ml warm water
Method
- Mix the flour, salt and yeast together in a large bowl. Make a well in the centre and add the oil and water, stirring well together to make a soft dough.
- Now, you can either turn the dough out and knead it by hand on a floured surface for about 10 minutes, or use an electric mixer with dough hooks attached for about 5 minutes. I used to always do it by hand until I actually tried the dough hooks, now I'm converted!
- Return the dough to the bowl (or leave it there if you used the hooks!) and cover with clingfilm. Pop it somewhere nice and warm (like an airing cupboard) for an hour so the dough can rise. It should just about double in size.
- Turn the dough out onto a floured surface and gently knead for 30 seconds or so, this is called 'knocking back'. It should be lovely and smooth at this point.
- Shape the dough into a large rectangle, the length of the baking tin and three times the width. Grease the tin well and fold the dough over itself three times lengthways. Pop it into the baking tin with the join underneath (it gives it a better appearance once baked). Cover in clingfilm again and leave to rise for another 30 minutes in a warm place once more.
- Preheat the oven to 220C/425F/Gas Mark 7. Bake the loaf in the centre of the oven for 25 - 30 minutes, or until golden brown. Turn out the loaf and tap the bottom, if it sounds hollow then you'll know it's cooked. Cool on a wire rack for at least half an hour before slicing. As delicious as warm bread is, it's so much harder to slice properly, and I've butchered many loaves with my impatience to get eating!
*This loaf should keep for 3 or 4 days in an airtight container.
Feb 26, 2011
Crumbly Raspberry Oat Slices
 |
| Moments before I om, nom, nom... |
Sort of a do-it-yourself cereal bar, without all the stabilisers and hydrogenated this and that. Any soft fruit can be used here, blackberries, blueberries, strawberries, whatever is your favourite. You could also add some chopped nuts if that's what takes your fancy. If you're using fresh fruits pop them into the freezer before you start, I like to break the frozen raspberries apart with my fingers so I have a fruit crumble, it gives me a much more even layer.
Makes: 16 slices
Ingredients
175g unsalted butter, diced and allowed to soften slightly
100g plain flour
75g extra coarse wholemeal flour
150g porridge oats
175g caster sugar
250g raspberries
zest of one lemon
icing sugar for dusting
Method
- Preheat your oven to 180C/350F/Gas Mark 4. Grease a 10 inch square shallow baking tin.
- In a large mixing bowl rub in your butter, flours and oats until they resemble a coarse crumble. Add your caster sugar and lemon zest and continue mixing until starting to come together slightly.
- Put half the crumble mix in the baking tray and pat down firmly. Cover with raspberries in an even layer.
- Add other half of crumble mix and pat down firmly again.
- Bake for 45 minutes - 1 hour or until golden brown in colour. Remove from oven, cut into slices and allow to cool in the tray before removing.
- Dust with a little icing sugar and serve. Delicious!
Feb 21, 2011
Honey Glazed Chicken
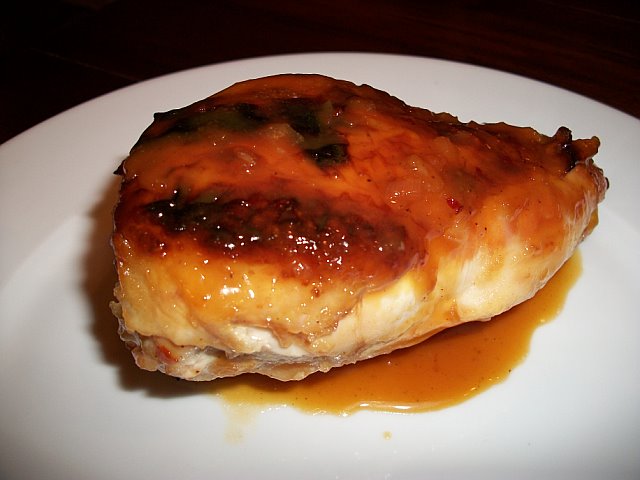
A simple idea for turning chickens breasts into something scrummy and delicious. Prepare to meet your new favourite dinner! Quantities are easily manipulated to serve a crowd.
Serves 2
Ingredients
2 chicken breasts, skin on, bone in
Half a lemon
1tbsp clear honey
1tbsp dark soy sauce
Method
- Preheat your oven to 190C/Gas Mark 5. Lay the chicken, skin side up, in a small baking or roasting dish. Season.
- Squeeze the juice from the lemon into a bowl and stir in the honey and soy sauce. Stir well to mix and spoon this mixture over the chicken breasts.
- Tuck the squeezed out lemon half between the two chicken breasts (to moisten and add flavour).
- Roast, uncovered, for 40-45 minutes until done and richly glazed, basting with the juices at least twice.
- Serve with green salad and garlic roasted potatoes
Feb 7, 2011
Cakes and bakes
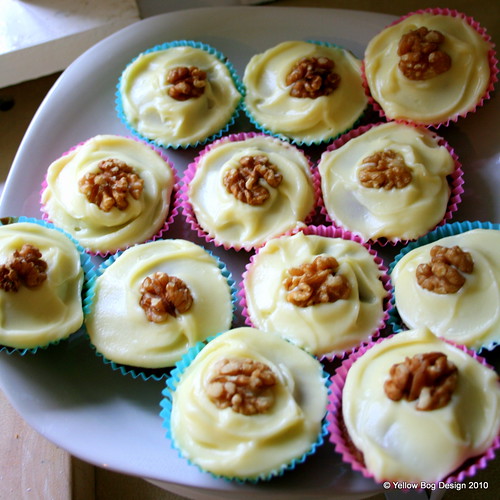 |
| Carrot-cake Cupcakes |
I keep meaning to add some of the cakes I've done for birthdays etc. Have at least got the pictures on today, will add the recipes over the next few weeks (I promise, for reals!). A good few of these bad boys are gluten-free so ya'll can enjoy ;-)
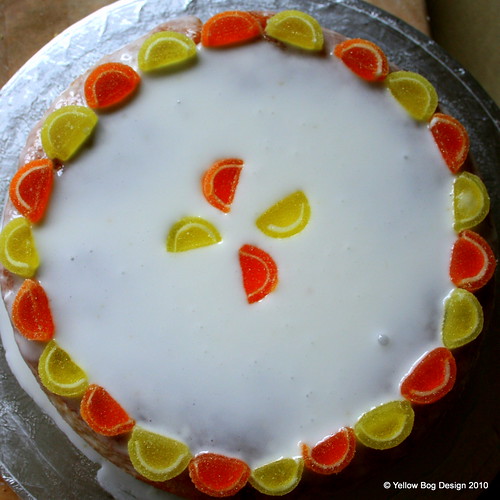 |
| Gluten-free Lemon Drizzle cake (made with...POTATO...oh yes!) |
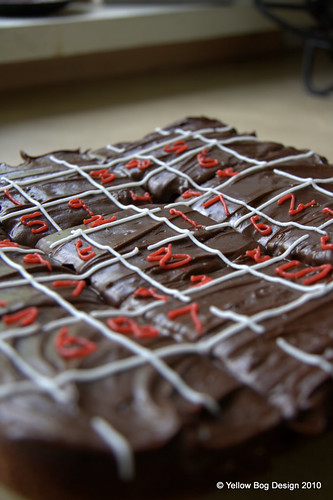 |
| Chocolate-fudge Sudoku Cake! |
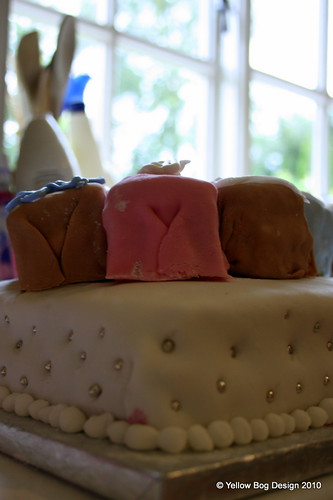 |
| Siobhan's birthday cake (not my most 100% prettiest one but dang it was good, especially for gluten-free!) |
Feb 4, 2011
Work in progress...
Wasn't too impressed with yesterday's muffins...though that didn't stop me eating them...but am re-working the recipe this morning. Will arrange a taste testing and should that go well I'll share the new recipe with you all.
Also have to pick up the ingredients for the other breakfast muffin idea I had and work out how I'm going to make them. Am so super excited about this recipe...watch this space...
In other news in the kitchen...

Also have to pick up the ingredients for the other breakfast muffin idea I had and work out how I'm going to make them. Am so super excited about this recipe...watch this space...
In other news in the kitchen...

Feb 3, 2011
Ginger Beef Stir-fry
Ingredients
400g lean beef sirloin
2 yellow onions
1 egg, beaten
1tbsp cornflour
Rapeseed oil
2tbsp soy sauce
2tsp sugar
half tsp sesame oil
half tsp rice wine vinegar
5cm piece fresh ginger, finely chopped
Method
400g lean beef sirloin
2 yellow onions
1 egg, beaten
1tbsp cornflour
Rapeseed oil
2tbsp soy sauce
2tsp sugar
half tsp sesame oil
half tsp rice wine vinegar
5cm piece fresh ginger, finely chopped
Method
- Thinly slice the beef against the grain.
- Stir together the beef and the egg in a bowl. Stir in the cornflour and 1 tsp of rapeseed oil. Leave to stand for about 30 minutes.
- Cut onions into quarters lengthways, then half the quarters across the middle and separate the pieces.
- In a small bowl mix together the soy sauce, sugar, sesame oil, vinegar, and 2 tablespoons of water. Set aside.
- Heat about half a cup of rapeseed oil in a wok over a medium-high heat until just smoking.
- Transfer the beef into the hot oil and cook until the colour has changed. Remove the beef using a slotted spoon and put aside on a platter.
- Add onions and ginger and stir-fry until onion is translucent, then transfer to the platter with the beef, again using the slotted spoon.
- Add the soy sauce mixture and simmer for 2-3 minutes to thicken. Stir in beef, onions and ginger and stir to coat.
- Serve with plain rice or noodles.
Maple Bacon Breakfast Muffins

For the last month or so I've been dying to make these muffins but every time I tried to I'd find I was out of maple syrup, or had no muffin cases, or something else would go awry. Finally today I made them, and they were so worth the wait. They've also given me an idea for another type of breakfast muffin...oh well, there goes the weekend!
Ingredients
220g plain flour
1tbsp baking powder
3tbsp golden caster sugar
1tsp salt
4 slices bacon, cooked crisp and crumbled (Marks & Spencer do Crispy Smoked Bacon Strips, 6 of them are perfect!)
225ml milk
2 eggs
125ml rapeseed oil
60ml maple syrup
Method
- Preheat oven to 200C/400F/Gas Mark 6. Line a muffin tin with 12 cases.
- Mix your dry ingredients, including the bacon, in a large bowl.
- Mix your wet ingredients in a large jug or another, smaller, bowl.
- Make a well in the centre of your dry ingredients and pour the wet mix in.
- Fold together with a metal spoon until well combined. There will still be a few lumps and bumps don't worry about them too much.
- Spoon your mix into your cases (about 3 tbsps a case should do it) and pop into the oven.
- Bake for 20 minutes, or until golden coloured and well risen.
- Cool on a wire rack. Seriously, they're much, much better cold. Plus you won't end up with a roof of mouth blister from the hot bacon like me...learn from my fail #LFMF
Subscribe to:
Posts (Atom)